本文最后更新于:2024年5月11日 下午
之前介绍了 OpenCV 完成畸变矫正的方法,本文记录直接使用矫正映射的方法。
原理
-
在完成图像畸变矫正获得矫正前后的相机内参,还有畸变系数之后,可以通过 OpenCV 的
initUndistortRectifyMap函数获取映射矩阵 -
获取映射矩阵后可以通过 OpenCV 的
remap函数直接对图像进行映射矫正畸变。
initUndistortRectifyMap
-
函数使用:
1
2
3
4
5
6
7
8
9
10
11
void cv::initUndistortRectifyMap
(
InputArray cameraMatrix, // 输入的矫正前的相机参数(3X3矩阵)
InputArray distCoeffs, // 输入的畸变系数(5X1矩阵)
InputArray R, // 输入的第一和第二摄像头坐标系之间的旋转矩阵
InputArray newCameraMatrix, // 输入的校正后的3X3摄像机矩阵
Size size, // 摄像头采集的无失真图像尺寸
int m1type, // map1的数据类型,可以是 CV_32FC1, CV_32FC2 或 CV_16SC2
OutputArray map1, // 输出的X坐标重映射参数
OutputArray map2 // 输出的Y坐标重映射参数
) -
计算方法如下:
- 其中 $ \left(k_{1}, k_{2}, p_{1}, p_{2}\left[, k_{3}\left[, k_{4}, k_{5}, k_{6}\left[, s_{1}, s_{2}, s_{3}, s_{4}\left[, \tau_{x}, \tau_{y}\right]\right]\right]\right]\right) $ 是失真系数。
- 输出的两个 map 和图像尺寸 Size 一样大。
remap
-
函数使用:
1
2
3
4
5
6
7
8
9
10
11
12
13
14
15
void cv::remap (
InputArray src, // 输入图像,即原图像,需要单通道8位或者浮点类型的图像
OutputArray dst, // 输出图像,即目标图像,需和原图形一样的尺寸和类型
InputArray map1, // 它有两种可能表示的对象:(1)表示点(x,y)的第一个映射;(2)表示CV_16SC2,CV_32FC1等
InputArray map2, // 有两种可能表示的对象:
//(1)若map1表示点(x,y)时,这个参数不代表任何值;
//(2)表示 CV_16UC1,CV_32FC1类型的Y值
int interpolation, // 插值方式,有四中插值方式:
// (1)INTER_NEAREST——最近邻插值
// (2)INTER_LINEAR——双线性插值(默认)
// (3)INTER_CUBIC——双三样条插值(默认)
// (4)INTER_LANCZOS4——lanczos插值(默认)
int borderMode = BORDER_CONSTANT, // 边界模式,默认BORDER_CONSTANT
const Scalar & borderValue = Scalar() // 边界颜色,默认Scalar()黑色
) -
计算方法:
示例代码
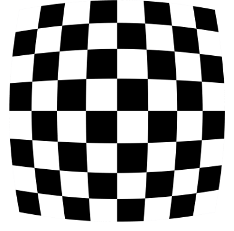
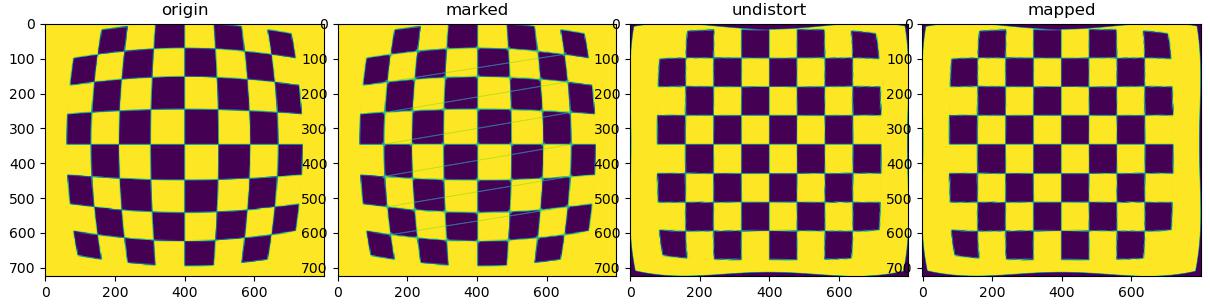
- 测试图像:
- 复用之前的代码
1 | |
- undistort 函数的结果和 mapped 的结果几乎一致,会有几个像素差 1 个灰阶。
参考资料
- https://docs.opencv.org/4.x/d9/d0c/group__calib3d.html#ga7dfb72c9cf9780a347fbe3d1c47e5d5a
- https://docs.opencv.org/4.x/da/d54/group__imgproc__transform.html#gab75ef31ce5cdfb5c44b6da5f3b908ea4
- https://blog.csdn.net/weixin_44279335/article/details/109448583
- https://www.zywvvd.com/notes/study/camera-imaging/distort-corr/distort-corr/
文章链接:
https://www.zywvvd.com/notes/study/image-processing/opencv/opencv-remap/opencv-remap/
“觉得不错的话,给点打赏吧 ୧(๑•̀⌄•́๑)૭”

微信支付

支付宝支付
OpenCV 畸变矫正映射
https://www.zywvvd.com/notes/study/image-processing/opencv/opencv-remap/opencv-remap/