本文最后更新于:2024年1月14日 晚上

频域乘法表现在空域中等效于卷积计算,但是计算量会大大降低,本文记录 OpenCV 实现频域操作图像的相关内容。

概述

  • 图像处理一般分为空间域处理和频率域处理,空间域处理是直接对图像内的像素进行处理。频率域处理是先将图像变换到频率域,然后在频率域对图像进行处理,最后通过反变换将图像变为空间域。傅里叶变换可以将图像变换为频率域, 傅立叶反变换再将频率域变换为空间域。

  • 在频域里,对于一幅图像,高频部分代表了图像的、纹理信息;低频部分则代表了图像的轮廓信息。如果图像受到的噪声恰好在某个特定的频率范围内,就可以使用滤波器来恢复原来的图像。因此傅里叶变换在图像处理中可以做到图像增强和去噪、图像分割之边缘检测、图像特征提取和压缩等。

空域卷积

  • 理论推导
  • 实现时利用 OpenCV 函数计算 DFT 变换,频域乘法与 IDFT 变换

实例演示

  • 测试图像

  • 转换为灰度图像作为测试图像

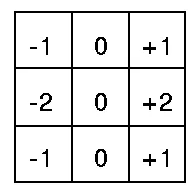
  • 卷积核为 x 方向上的 Sobel 算子

  • 示例代码
1
2
3
4
5
6
7
8
9
10
11
12
13
14
15
16
17
18
19
20
21
22
23
24
25
26
27
28
29
30
31
32
33
34
35
36
37
# 测试灰度图像
image = mt.cv_rgb_imread('img1.jpg', gray=True)
image = mt.image_resize(image, [300, 300]).astype('float32')

# 卷积核
kernal = np.array([[-1, 0, 1], [-2, 0, 2], [-1, 0, 1]], dtype='float32')
# Sobel 操作
sob_res = cv2.Sobel(image, -1, 1, 0, ksize=3)
# 自定义空域卷积操作
cus_res = cv2.filter2D(image, -1, kernal)

# 频域卷积公式中下标为负,调整卷积核
kernal = kernal[:, ::-1]

# 获取最佳 DFT 计算尺寸
dft_width = cv2.getOptimalDFTSize(image.shape[1] + kernal.shape[1] -1)
dft_height = cv2.getOptimalDFTSize(image.shape[0] + kernal.shape[0] -1)

# 预留 DFT 空间
tempA = np.zeros([dft_height, dft_width], dtype='float32')
tempA[:image.shape[0], :image.shape[1]] = image
tempB = np.zeros([dft_height, dft_width], dtype='float32')
tempB[:kernal.shape[0], :kernal.shape[1]] = kernal

# DFT 变换
dft_res_A = cv2.dft(tempA, flags=0, nonzeroRows=image.shape[0])
dft_res_B = cv2.dft(tempB, flags=0, nonzeroRows=kernal.shape[0])

# 频域乘法
mul_res = cv2.mulSpectrums(dft_res_A, dft_res_B, flags=cv2.DFT_COMPLEX_OUTPUT)

# DFT 反变换
inverse_res = cv2.dft(mul_res, flags=cv2.DFT_INVERSE + cv2.DFT_SCALE, nonzeroRows=image.shape[0]-kernal.shape[0] + 1)

# 获取计算结果
conv_res = inverse_res[:image.shape[0]-kernal.shape[0] + 1, :image.shape[1]-kernal.shape[1] + 1]
PIS(sob_res[1:-1, 1:-1], cus_res[1:-1, 1:-1], conv_res)

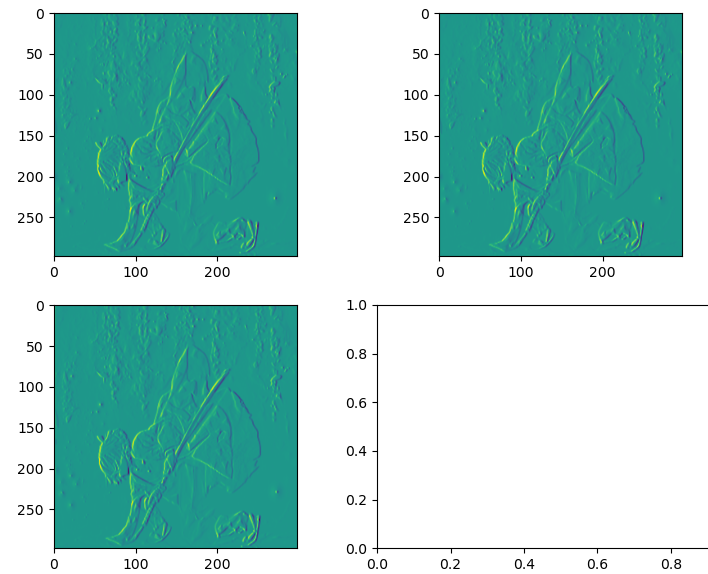
经过频域计算的卷积结果与空域结果有一点点出入,可能和量化有关

图像处理

  • 将图像转换到频域空间信息没有丢失,但是可以在频域中对图像进行处理
  • JPEG 图像压缩用的就是丢去频域中高频信息的方式实现图像压缩的

实例演示

  • 此处示例一种简单的图像低通、高通滤波
1
2
3
4
5
6
7
8
9
10
11
12
13
14
15
16
17
18
19
20
21
22
23
24
25
26
27
28
29
30
31
32
33
34
35
36
img = mt.cv_rgb_imread('img1.jpg', gray=True)

# 第二步:进行数据类型转换
img_float = np.float32(img)
# 第三步:使用cv2.dft进行傅里叶变化
dft = cv2.dft(img_float, flags=cv2.DFT_COMPLEX_OUTPUT)
# 第四步:使用np.fft.fftshift将低频转移到图像中心
dft_center = np.fft.fftshift(dft)

# 第五步:定义掩模:生成的掩模中间为1周围为0,这是保留低频区域
crow, ccol = int(img.shape[0] / 2), int(img.shape[1] / 2) # 求得图像的中心点位置
mask_low = np.zeros((img.shape[0], img.shape[1], 2), np.uint8)
mask_low[crow - 30:crow + 30, ccol - 30:ccol + 30] = 1

mask_hight = np.ones((img.shape[0], img.shape[1], 2), np.uint8)
mask_hight[crow - 30:crow + 30, ccol - 30:ccol + 30] = 0

# 第六步:将掩模与傅里叶变化后图像相乘
# 保留中间部分 低通滤波器
mask_img_low = dft_center * mask_low
# 保留周围部分 高通滤波器
mask_img_hight = dft_center * mask_hight

# 第七步:使用np.fft.ifftshift
img_idf_low = np.fft.ifftshift(mask_img_low) # (将低频移动到原来的位置)
img_idf_hight = np.fft.ifftshift(mask_img_hight) # (将高频移动到原来的位置)

# 第八步:使用cv2.idft进行傅里叶的反变化
img_idf_low = cv2.idft(img_idf_low)
img_idf_hight = cv2.idft(img_idf_hight)

# 第九步:使用cv2.magnitude转化为空间域内
img_idf_low = cv2.magnitude(img_idf_low[:, :, 0], img_idf_low[:, :, 1])
img_idf_hight = cv2.magnitude(img_idf_hight[:, :, 0], img_idf_hight[:, :, 1])

PIS([img_idf_low, 'Lowpass'], [img_idf_hight, 'Highpass'])

参考资料


文章链接:
https://www.zywvvd.com/notes/study/image-processing/opencv/opencv-dft-conv/opencv-dft-conv/


“觉得不错的话,给点打赏吧 ୧(๑•̀⌄•́๑)૭”

微信二维码

微信支付

支付宝二维码

支付宝支付

OpenCV 图像频域操作
https://www.zywvvd.com/notes/study/image-processing/opencv/opencv-dft-conv/opencv-dft-conv/
作者
Yiwei Zhang
发布于
2022年3月28日
许可协议