本文最后更新于:2024年5月11日 下午
当分析一张图像的时候,针对轮廓,我们也许有很多事情要做。毕竟,所有轮廓都是或即将是我们想要进行识别或操作的。另外相关的还有多种对轮廓的处理,如描述轮廓,简化或拟合轮廓,匹配轮廓到模板,等等。本文记录 OpenCV 中的轮廓分析的相关操作。
多边形逼近
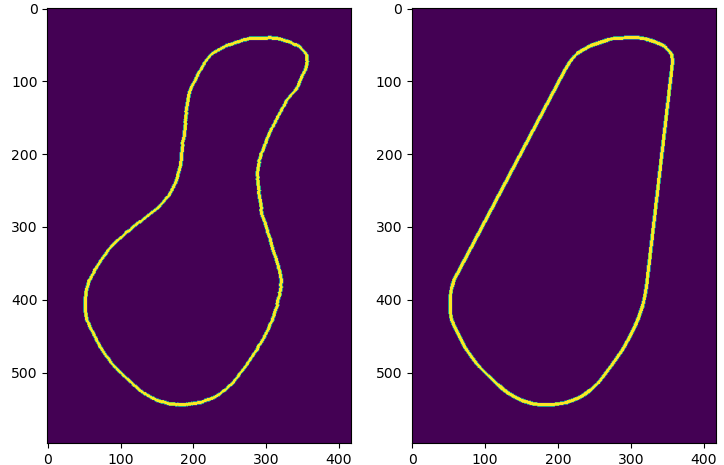
当我们绘制一个多边形或进行形状分析时,通常需要使用多边形逼近一个轮廓,使顶点数变少。有多种方法可以实现这个功能,OpenCV实现了其中的两种逼近方法。
Douglas-Peucker(DP) 逼近算法
- 该算法首先从轮廓(图B)中挑出两个最远的点,将两点相连(图C)。然后在原来的轮廓上寻找一个离线段距离最远的点,
将该点加入逼近后的新轮廓中。 - 算法反复迭代,不断将最远的点添加到结果中,直到所有点到多边形的最短距离小于 parameter 参数指定的精度(图F)。从这里可以看出,将该精度设置为轮廓周长或外包矩形周长等表示轮廓总长度的值的几分之一比较合适。
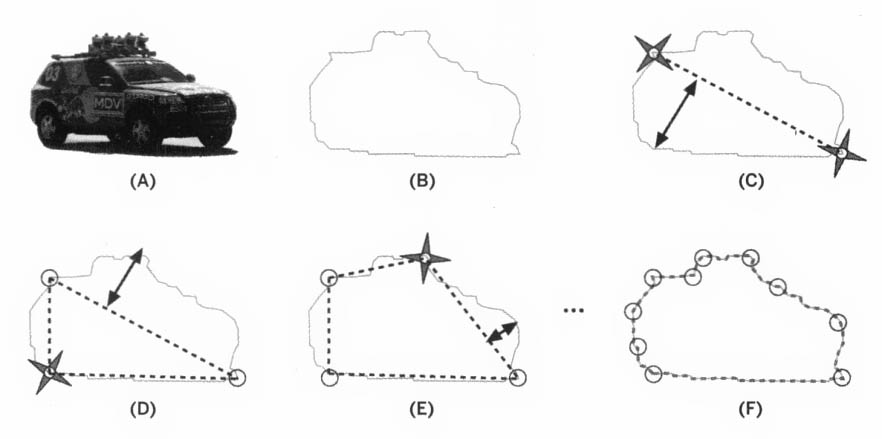
DP算法的示意图:(A)为原始图像;(B)为提取的轮廓;©表示从最远的两个点开始;(D~F)表示其他点的选择过程
cv2.approxPolyDP
以指定精度逼近多边形曲线。
- 函数使用
1 | |
- 示例代码
1 | |

几何及特性概括
- 轮廓处理中经常遇到的另一个任务是计算一些轮廓变化的概括特性。这可能包括长度或其他一些反应轮廓整体大小的量度。另一个有用的特性是轮廓矩(contour moment)可以用来概括轮廓的总形状特性,这部分我们在下一节讨论。以下一些方法对任何形式的点集都适用(包括那些并不代表轮廓的点集)。我们会指出哪些方法只适用于轮廓(如计算弧长),而哪些方法对任何点集都适用(如外包矩形)。
cv2.arcLength
计算轮廓周长或曲线长度。
- 函数使用
1 | |
- 示例代码
1 | |
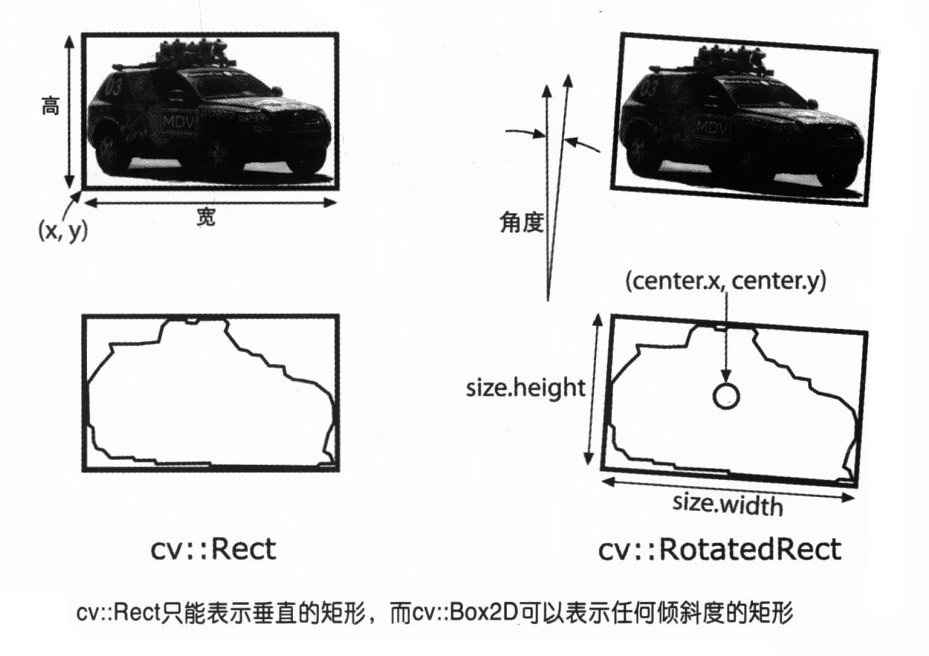
cv2.boundingRect
- 获得矩形包围框。当然,长度和面积只是轮廓的简单特性。描述轮廓的一种最简易的方法是为它加上一个外包围框。最简单的途径是直接计算外包围矩形。这正是
cv2.boundingRect函数做的。 - 该句型为正方向的矩形(不能旋转)
计算点集或灰度图像的非零像素的右上边界矩形。
- 函数使用
1 | |
- 示例代码
1 | |
cv2.minAreaRect
cv2.boundingRect得到的矩形框存在一个问题,只能表现一个四边水平和垂直的矩形。而函数cv2.minAreaRect可以返回一个包围轮廓最小的矩形,这个矩形很可能是倾斜的。
查找包含输入 2D 点集的最小区域的旋转矩形。
- 函数使用
1 | |
- 示例代码
1 | |
中心,长宽,角度
cv2.minEnclosingCircle
获得最小包围圆
- 函数使用
1 | |
- 示例代码
1 | |
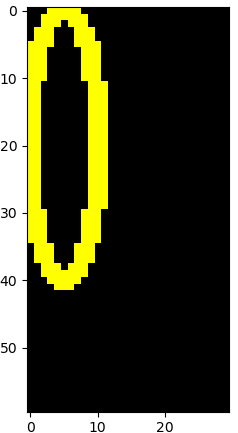
cv2.fitEllipse
拟合椭圆
- 函数使用
1 | |
- 示例代码
1 | |
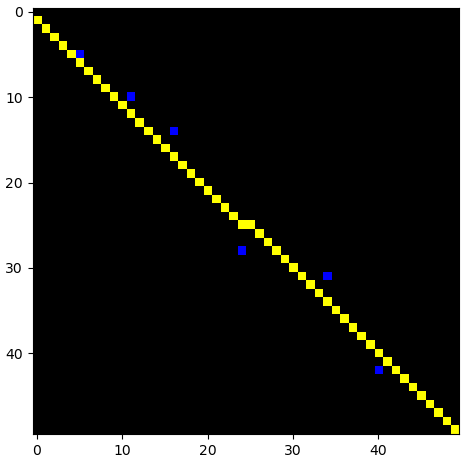
cv2.fitLine
拟合点成为一条直线
-
函数通过最小化 $ \sum_{i} \rho\left(r_{i}\right) $ 来拟合2D或3D的一系列点成为一条直线,其中$r_i$ 是第$i$ 个点距离直线的距离度量,$ \rho® $ 是一个距离计算函数,可以有如下的计算方式:
| 参数 | 计算方法 |
|---|---|
| cv2.DIST_L2 | $ \rho ( r )=r^{2} / 2 $ (最简单也是最快的,最小二乘法) |
| cv2.DIST_L1 | $ \rho ( r ) =r$ |
| cv2.DIST_L12 | $ \rho ( r )=2 \cdot\left(\sqrt{1+\frac{r^{2}}{2}}-1\right) $ |
| cv2.DIST_FAIR | $ \rho ( r )=C^{2} \cdot\left(\frac{r}{C}-\log \left(1+\frac{r}{C}\right)\right) \quad where \quad C=1.3998 $ |
| cv2.DIST_WELSCH | $ \rho ( r )=\frac{C^{2}}{2} \cdot\left(1-\exp \left(-\left(\frac{r}{C}\right)^{2}\right)\right) \quad where \quad C=2.9846 $ |
| cv2.DIST_HUBER | $ \rho ( r )=\left\{\begin{array}{ll}r^{2} / 2 & \text { if } r < C \\ C \cdot(r-C / 2) & \text { otherwise }\end{array} \quad\right. $ $where \quad C=1.345$ |
- 函数使用
1 | |
- 示例代码
1 | |
cv2.convexHull
计算轮廓凸包
- 函数使用
1 | |
- 示例代码
1 | |
几何学测试
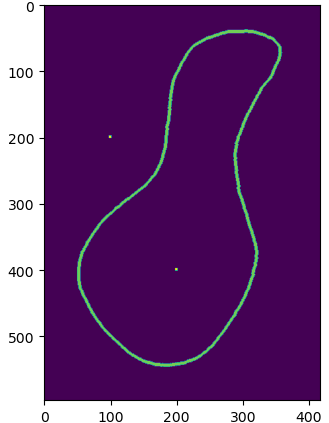
cv2.pointPolygonTest
判断点是否在轮廓内部
- 函数使用
1 | |
- 示例代码
1 | |
cv2.isContourConvex
函数用于判断轮廓是否为凸。判断一条轮廓是否为凸轮廓是常见的需求。这样做的理由很多,其中最常见的是许多算
法只能用于凸多边形,还有许多算法在多边形为凸时可以大大简化。
- 函数使用
1 | |
- 示例代码
1 | |
源码
https://github.com/zywvvd/Python_Practise/tree/master/OpenCV/Chapter 14
参考资料
- 《学习OpenCV》 第十四章
文章链接:
https://www.zywvvd.com/notes/study/image-processing/opencv/opencv-contours-ana/contours-ana/
“觉得不错的话,给点打赏吧 ୧(๑•̀⌄•́๑)૭”

微信支付

支付宝支付