1
2
3
4
5
6
7
8
9
10
11
12
13
14
15
16
17
18
19
20
21
22
23
24
25
26
27
28
29
30
31
32
33
34
35
36
37
38
39
40
41
42
43
44
45
46
47
48
49
50
51
52
53
54
55
56
57
58
59
60
61
62
63
64
65
66
67
68
69
70
71
72
73
74
75
76
| import numpy as np
import cv2
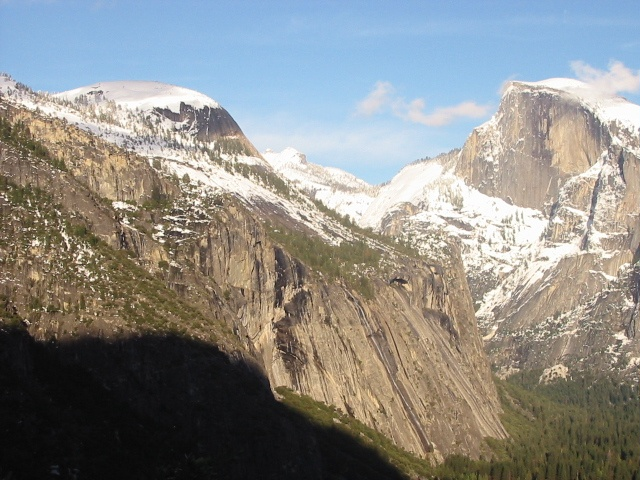
img1 = cv2.imread('1.png')
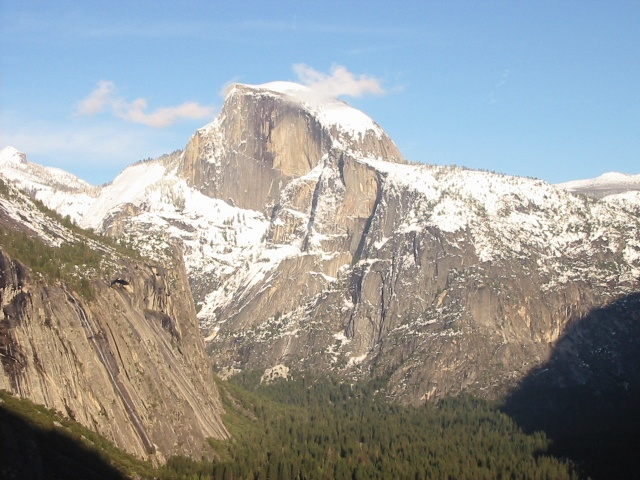
img2 = cv2.imread('2.png')
cv2.imshow('img', np.concatenate((img1,img2),axis=1))
cv2.waitKey(1)
ft_detector = cv2.SIFT_create()
keyPoints1, descriptors1 = ft_detector.detectAndCompute(img1, None)
keyPoints2, descriptors2 = ft_detector.detectAndCompute(img2, None)
bf = cv2.BFMatcher(crossCheck=False)
matches = bf.match(descriptors1, descriptors2)
matches = sorted(matches, key = lambda x:x.distance)
sourcePoints = np.float32([ keyPoints1[m.queryIdx].pt for m in matches ]).reshape(-1, 1, 2)
destinationPoints = np.float32([ keyPoints2[m.trainIdx].pt for m in matches ]).reshape(-1, 1, 2)
H, _ = cv2.findHomography(sourcePoints, destinationPoints, method=cv2.RANSAC, ransacReprojThreshold=5.0)
print(H)
TL = np.linalg.solve(H, np.array([0,0,1]))
TL = np.round(TL/TL[-1])
BL = np.linalg.solve(H, np.array([0,img2.shape[0]-1,1]))
BL = np.round(BL/BL[-1])
TR = np.linalg.solve(H, np.array([img2.shape[1]-1,0,1]))
TR = np.round(TR/TR[-1])
BR = np.linalg.solve(H, np.array([img2.shape[1]-1,img2.shape[0]-1,1]))
BR = np.round(BR/BR[-1])
u0_im_ = int(min(TL[0], BL[0], TR[0], BR[0])); u1_im_ = int(max(TL[0], BL[0], TR[0], BR[0]))
v0_im_ = int(min(TL[1], BL[1], TR[1], BR[1])); v1_im_ = int(max(TL[1], BL[1], TR[1], BR[1]))
print(u0_im_, u1_im_, v0_im_, v1_im_)
u0 = min(0, u0_im_)
u1 = max(img1.shape[1]-1, u1_im_)
ur = np.arange(u0, u1 + 1)
v0 = min(0, v0_im_)
v1 = max(img1.shape[0]-1, v1_im_)
vr = np.arange(v0, v1 + 1)
cw = u1 - u0 + 1
ch = v1 - v0 + 1
print(u0, u1, v0, v1, ch, cw)
u, v = np.meshgrid(ur, vr)
u = np.float32(u); v = np.float32(v)
warped_img1 = cv2.remap(img1, u, v, cv2.INTER_LINEAR, borderMode=cv2.BORDER_REFLECT_101)
mask1 = np.ones((img1.shape[0],img1.shape[1]))
warped_mask1 = cv2.remap(mask1, u, v, cv2.INTER_LINEAR)
z_ = H[2,0]*u + H[2,1]*v + H[2,2]
map_x = (H[0,0]*u + H[0,1]*v + H[0,2]) / z_
map_y = (H[1,0]*u + H[1,1]*v + H[1,2]) / z_
map_x = np.float32(map_x); map_y = np.float32(map_y)
warped_img2 = cv2.remap(img2, map_x, map_y, cv2.INTER_LINEAR, borderMode=cv2.BORDER_REFLECT_101)
mask2 = np.ones((img2.shape[0],img2.shape[1]))
warped_mask2 = cv2.remap(mask2, map_x, map_y, cv2.INTER_LINEAR)
mass = warped_mask1 + warped_mask2
mass[mass==0] = np.nan
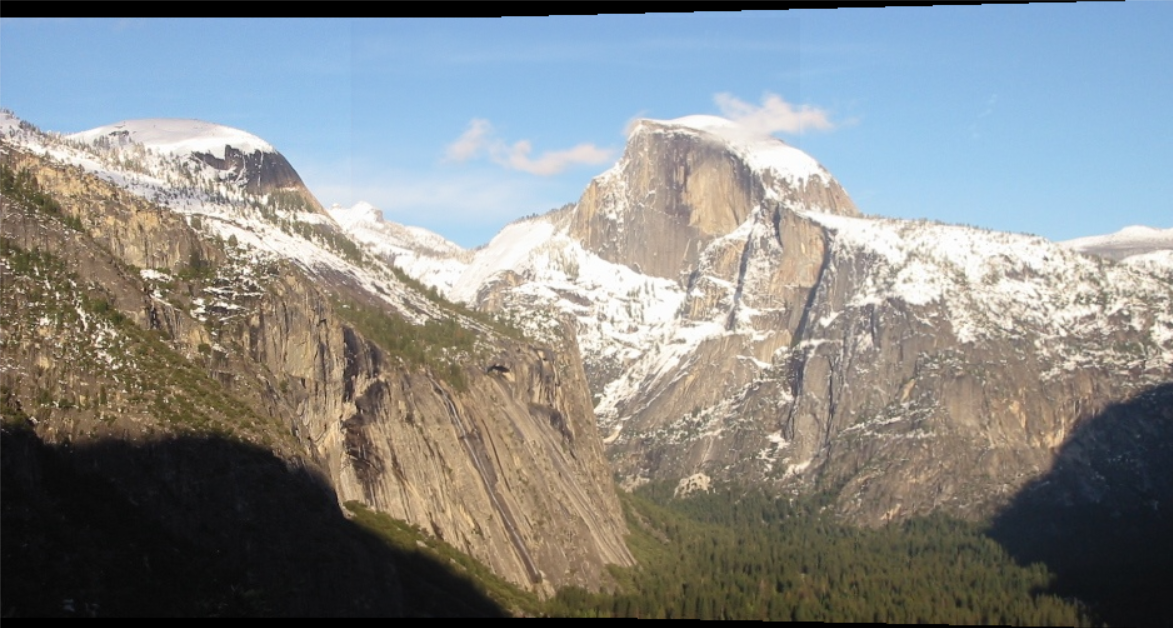
output = np.zeros_like(warped_img1)
for c in range(3):
output[:,:,c] = (warped_img1[:,:,c] * warped_mask1 + warped_img2[:,:,c] * warped_mask2) / mass
cv2.imshow('warped_img1', np.uint8(warped_img1 * warped_mask1[..., np.newaxis].repeat(3, axis=-1)))
cv2.imshow('warped_img2', np.uint8(warped_img2 * warped_mask2[..., np.newaxis].repeat(3, axis=-1)))
cv2.imshow('output_img', output)
cv2.waitKey(0)
cv2.destroyAllWindows()
|