本文最后更新于:2024年5月7日 下午
jupyterlab 作为 jupyter 的扩展版本,易用性强,结果保存很合理。突然发现可以添加debugger插件,实现在jupyterlab中调试代码,本文记录方法。
基本流程
- 安装 Anaconda
- 安装 jupyterlab
- 安装 node.js
- 安装 xpython
- 建立 jupyterlab 工程
- 搜索并安装插件
- 使用插件进行debug
具体步骤
安装Anaconda
- 下载地址: https://www.anaconda.com/products/individual#Downloads
- 下载安装包安装即可,需要配置环境变量
安装jupyterlab
1 | |
安装 node.js
如果不装会报错:
1 | |
- 下载地址:https://nodejs.org/en/download/
- Win 下载 Windows Installer (.msi)
- 直接安装即可
- Linux 下载 Linux Binaries (x64)
1 | |
之后添加环境变量到
/etc/profile或~/.bashrc文件
1 | |
- 测试
1 | |
安装 xpython
1 | |
JupyterLab 2.0+
xeus-python 0.8.0+
notebook 6+
- 随后可以使用 xpython
建立 jupyterlab 工程
1 | |
- 有需要映射端口的同学可以参考 从服务器映射 jupyter 到本机应用
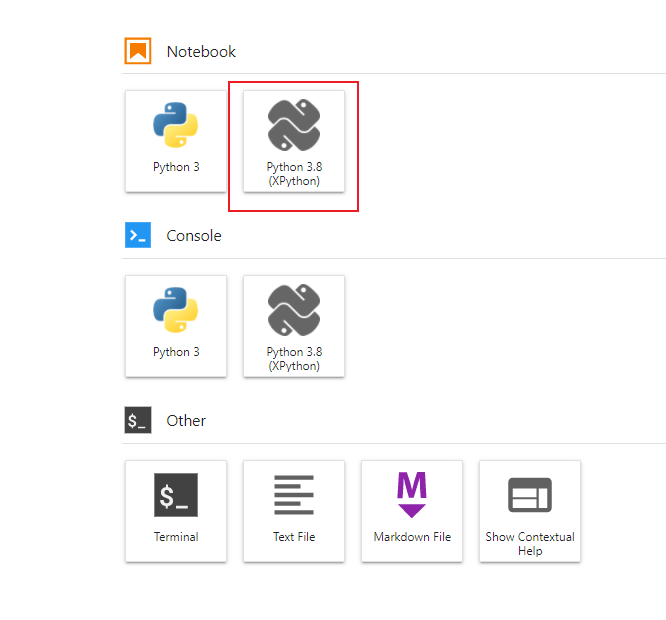
搜索并安装插件
- 进入 jupyterlab, enable Warning 中的内容即可使用扩展

- 搜索并安装插件
- 可以搜索之间单击
install- 也可以执行命令
jupyter labextension install @jupyterlab/debugger
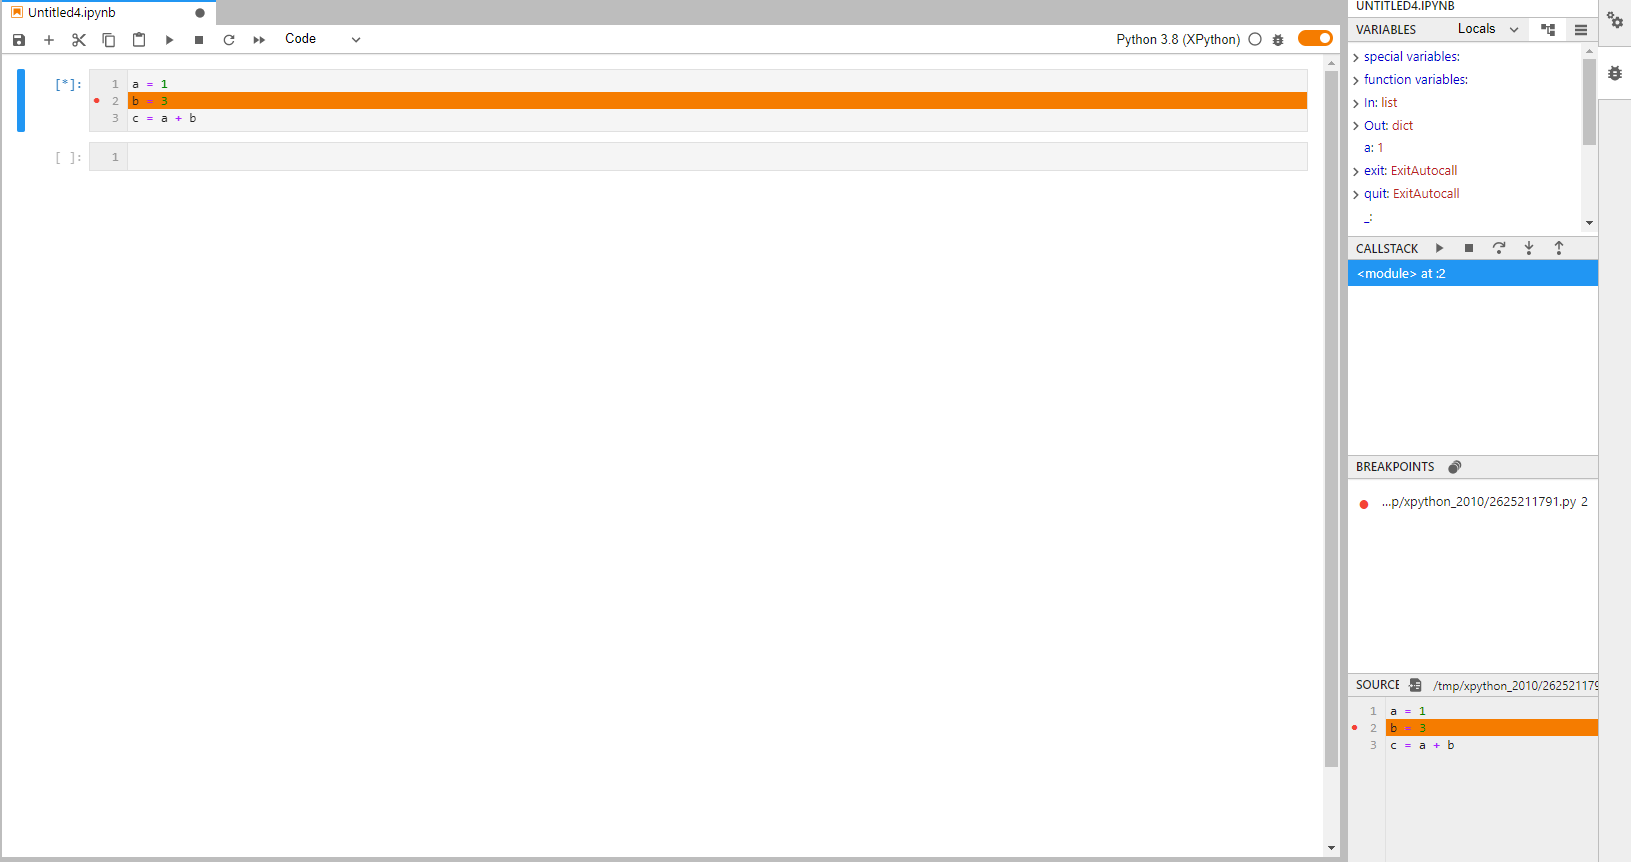
使用插件进行debug
- 建立 xpython 工程
- 设置断点,debug 程序
参考资料
文章链接:
https://www.zywvvd.com/notes/coding/python/jupyter-lab-extension/jupyter-lab-extension/
“觉得不错的话,给点打赏吧 ୧(๑•̀⌄•́๑)૭”

微信支付

支付宝支付
为 jupyterlab 添加 debugger 扩展
https://www.zywvvd.com/notes/coding/python/jupyter-lab-extension/jupyter-lab-extension/